A QuickBooks payroll tip for replacing a lost employee paycheck.

This situation can create quite a quandary for some business owners and their payroll clerks about how to replace this lost check. The immediate need is to reissue the paycheck.
Follow these easy steps to replace a lost employee paycheck:
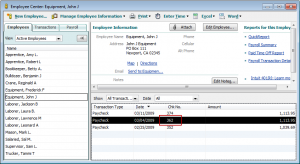
- Go the Employee Center, click on the Employees tab and click on the Employees name to display his payroll history
- Write down the Number of the check that you will be replacing.

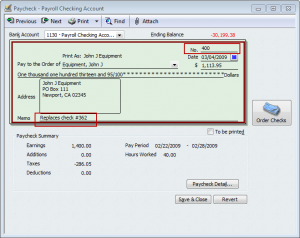
- Double-click on the check entry to open the paycheck form.
- Change the original check number to be the number of the current check that you will be printing.
- In the memo field type in “Replaces original check # XXXXX”.
- Click the Print button at the top of the paycheck form. A window will display prompting you to record your changes; click the Yes button. Another window will appear and you may need to type in the current check number again. Follow any remaining prompts, and the paycheck will be recorded with the new check number.

You can now sign the replacement paycheck and give it to your employee so he can cash it.
The next step is to record the original check number as a “voided” check to maintain a good paper trail and it’s important to resist the urge to skip this step!
To record the original check number as a voided check:
- From the Home Page, click on the Write Checks icon
- In the check number field enter the original paycheck number
- Make sure that the date is the date of the original paycheck
- In the Pay to the Order of field, using the drop down menu select the Employee’s Name. You may immediately receive a warning message stating “If you want to create a paycheck for this employee, please use the built-in payroll features” – click the Ok button.
- From the Edit menu -> choose Void Check. This places the word VOID: in the memo field.
- Click into the Memo field and after the word VOID: type in “Replaced with Check # XXXX”
- Click into the Account field at the bottom of the check and choose your Payroll Wages account.
- Click Save & Close.
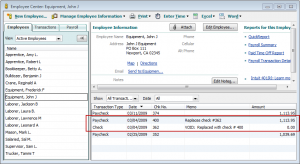
Now when you go to the Employee Center and click on the Employee’s name, you’ll see a visible record of the events that have just taken place, just like the screenshot below:

NOTE: If the information that you see in the Employee Center doesn’t look like our screen shots, you can change your settings to make this information display by following these instructions.
If your right panel doesn’t display employee information at the top and paycheck transactions at the bottom – at the upper right of the Employee list window you’ll see an <– button, click on it to change the display to show this information.
If the transaction window doesn’t display the check number and memo field columns, right click anywhere in the transaction window and choose Customize Columns, a window will display. Here you can click on Chk No to highlight it and then click the Add button (this moves the Chk No field from the Available Columns window to the Chosen Columns window). Select Memo to highlight it and then click the Add button. Move the newly added items in the Chosen Columns window around arrange them as you would like to see the information displayed. Click Ok when you have arranged the information to your liking.
As an additional precaution, you may want to contact your bank and issue a Stop Payment on the original check number. While you may be charged a fee by your bank, it will ensure that the original check is never cashed.
We hope you’ve found this QuickBooks Payroll Tip to be helpful. If so, please feel free to leave a comment below.