NOTE: This feature is also available in QuickBooks 2013 and 2014.
QuickBooks 2012 will include batch timesheet creation as an enhancement to the current “Use Weekly Timesheet” feature, allowing you the option to select multiple employee or vendor names for time entry. From the information that I’ve seen, Intuit is marketing this feature to contractors as a timesaver, and it may be for some businesses, BUT THERE IS A CATCH……
Each group of employees or vendors that you select MUST work on the same Job, under the same Service Item AND the same Payroll Item MUST be used during timesheet creation – additionally, they must ALL work the same number of hours each day!
See the Batch Timesheet function in action on our YouTube video
In order to successfully use the Batch Timesheet feature in QuickBooks Pro/Premier 2012 and Enterprise 12.0:
1. You MUST enable timetracking
- Logged into QuickBooks as the QuickBooks Administrator in Single-User Mode
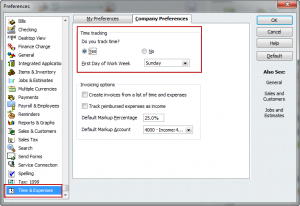
- From the Edit menu -> choose Preferences -> scroll to Time & Expenses {the last preference} -> click on the Company Preferences tab
- Under the Time Tracking – Do you track time option -> select Yes and set the FIRST day of your work week

- Click OK to save your changes
2. The Use time data to create paychecks option MUST be enabled for each employee
- From the Employee menu -> choose Employee Center -> click on the Employees tab -> double-click on an employee name OR click the Edit Employee button
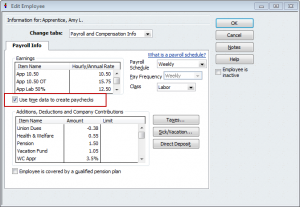
- From the Change tabs drop down menu -> choose Payroll & Compensation Info
- Make sure the Use time data to create paychecks option is checked.

- Click the OK button to save the changes for this employee
- Repeat for each employee in your employee list
3. You MUST use the Weekly Timesheet function
- From the Employee menu -> choose Enter Time -> Use Weekly Timesheet OR from the Home Page -> click the Enter time icon -> Use Weekly Timesheet
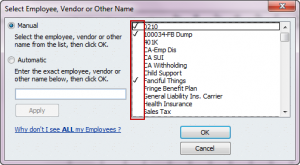
- In the Name field, click the drop down list and select either Multiple Names (Payroll) OR Multiple Names (Non-Payroll)

- In the pop-up window, select multiple names, by placing a checkmark next to the name, and click ok to finalize your selections
- Enter timesheet information, selecting the Job, Service Item and Payroll Item
- Click on the Save and Close button to enter the information
Be aware of a potential problem:
A potential problem that I see with this feature, is let’s say that there are 4 employees {or vendors} who worked on a Job Monday through Thursday; on Friday, only 3 of these employees {vendors} were there. When you enter multiple timesheets, I forsee most people selecting all 4 employees/vendors and automatically entering ALL of the the time for the entire week. Using the batch timesheet option, you would need to be very careful when entering hours in this type of situation – as it could result in an employee or vendor being paid for erroneous hours worked and no one catching it. On the flip side, for employees who worked overtime, additional entries would be required on their individual timesheets to record overtime hours – if not this would result in underpayment.

